How to Install a Plantation Shutter
Just a brief look at what we do and how we do it.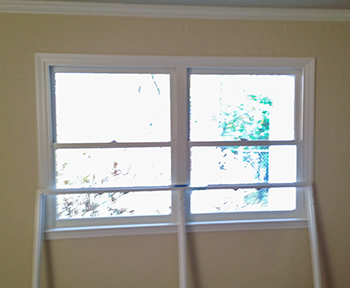
First of all, please excuse the quality of the photos. These pics were taken from my phone while I was installing and the customer was remodeling so poor lighting as well. That being said: I wanted to show a simple example of installing an Outside-Mount Decorative Frame on top of existing trim work.
As you can see from the frame leaning up against the window, we do a lot of the work ahead of the time at our shop. The frame is cut and assembled on the table. We also hinge and install the magnets and dry fit the panels in the frame to make sure everything fits before we show up at your house. 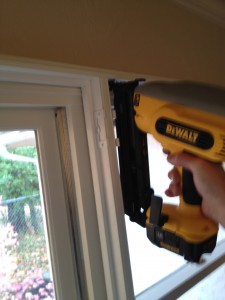
The first step.
Set the frame up in the window. The shutter frame has a sill plate at the bottom that will sit on top of the existing sill supporting the weight of the frame. With one hand on the frame, use the other to grab your nail gun and shoot the first nail against the t-post in the center. 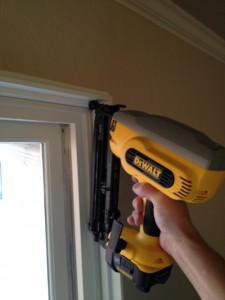
Shoot the second nail at the right corner in the top frame. Repeat with the left side. We use 2 1/2" 16 gauge finish nails. The nail will sink into the frame going through the existing trim, the drywall and then finally into the stud. One nail can hold the entire frame up. Of course, we go all the way around to secure it properly.
For right now we are just tacking the frame up to get things into position. You will see from what follows why we wait to finish nailing until we have everything set into place. 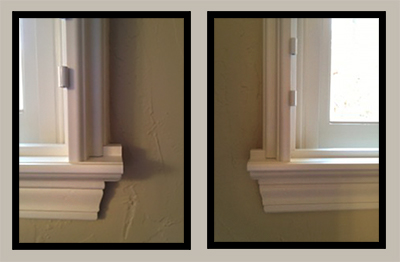
Now the frame will stay up while we can move the bottom into position.
You can see from these photos that the customer has chosen an extended sill plate. This means the shutter frame sill plate will go past the edge of the frame and meet up with the edge of the existing window sill.
You simply line them up and set a nail in the bottom to hold it into place. 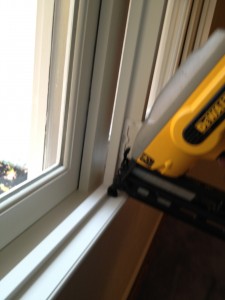
Set a nail into the center of the sill plate against the t-post similar to the top.
The reason we don't shoot the bottom corners yet is in case we have to rack the frame up and down or left to right. Be careful, most window sills are only 3/4" thick and stick away from the trim (called an apron) underneath. Many times we will switch out the clip and insert 5/8" nails into the gun for the sill. 
Hanging the panels. With the hinges pre-hung on both the frame and the panels this is the fun part. Working from left to right, set the panels into place and pop in the hinge pins. 
As you set the panels in place take a step back and look at how they lining up at the top and bottom. You can see from this pic that the right panel is lower then the left. This is an easy adjustment.
To rack the right panel up use a thin flat bar under the sill plate and raise the right side of the frame up off the window sill. With only one nail in the top right corner, you can carefully raise the frame into position without causing damage to the existing trim work. Keep the bar in place while you check the gap. When the gap is right, set a nail to hold the frame at that point. Then carefully remove the bar. 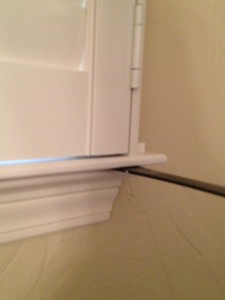
By using a special tool we like to call The Persuader, tap lightly down on the left side to lower the left. You can also rack the frame left to right or right to left with a little love from this handy tool. Caution; when racking left to right, be careful not to go too far one way or another. This can lead to the louvers looking crooked or slanted in the window. Racking up and down is more successful in this regard. You are less likely to notice the gap under the sill then you are down the sides. Especially when you are going into a corner. 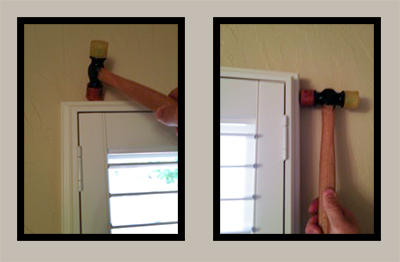
Once the gaps are all good you can start finish nailing the frame. Shoot a nail at each corner on the side frames then on top and bottom of each hinge. Also, shoot a nail at each of the magnets as well to lock them into place. 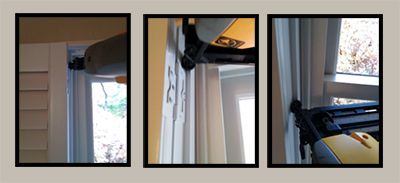
All that is left to do is caulk under the sill plate to hide the light gap and wipe the panels down. Like most synthetic Plantation Shutters, these PolyWood Plantation Shutters can be easily wiped down with a wet cloth or Swiffer. Nothing too abrasive or harsh like Ammonia. Just a damp rag and you are done. Let the caulk dry for a couple of hours before you mess with the panels too much. 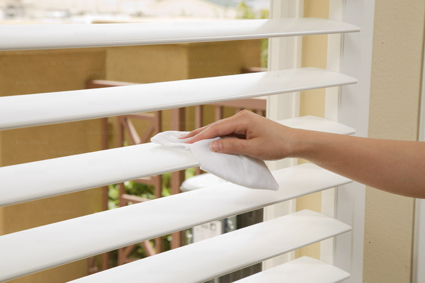
That is how we do it. Simple huh?
What a beautiful window treatment that will be enjoyed for years to come.